Simple SNS to Telegram notifications bot
· 5 min read
In this post I'll guide you through the steps to create a private Telegram bot that can send notifications from Amazon SNS to a one-on-one Telegram chat.
Motivation
I've used this setup for a few months now and here are my use cases:
- Scheduled reminders. I have a few scheduled CloudWatch Events to remind me about various routine activities and random nudges from a database of ideas I saved from articles and books.
- Application alerts. I get build alerts from AWS Amplify Console, alarms from CloudWatch, and stack create notifications from CloudFormation.
- Weird one-off stuff. I needed a mechanism to track updates on a certain web page, so I wrote a Lambda that crawled it every 5 minutes and sent me alerts when there was a change.
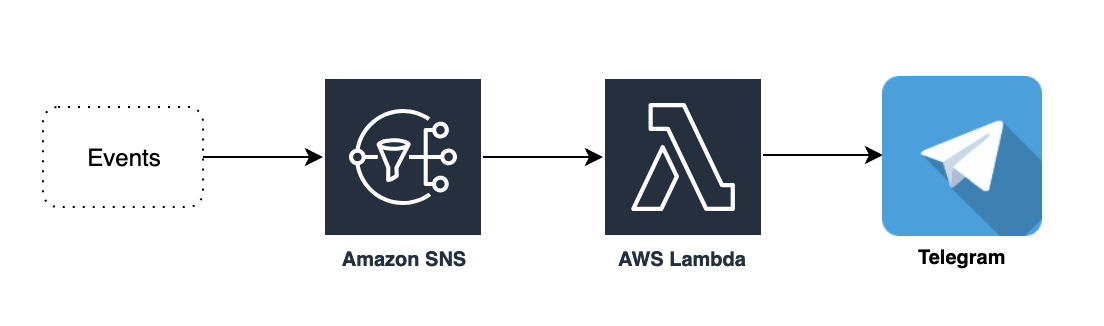
Architecture
Here's what we will build. We'll have an SNS topic that can receive events and publish them to a Lambda function. The Lambda will publish to Telegram. It looks simple but there are some gotchas around making these notifications private.
1. Create a Telegram bot
First, we need to create a new bot in Telegram. In order to do that, we need to use BotFather, a first-party Telegram bot that creates other bots.
In Telegram, find @botfather or simply go to http://t.me/botfather to start a conversation with BotFather. The BotFather avatar looks a little like Abraham Lincoln and has a blue “verified” checkmark next to its name. Make sure you use the official bot and not any of the scams with similar user names!
To create a bot, send /newbot to BotFather and follow the instructions. After you complete the setup, BotFather will send you the token that you will use to publish messages to the bot. Copy the token highlighted in red, you'll need it later.

2. Get your Telegram user ID
To publish notifications specifically to your private chat with the bot, you need to know your user ID. In addition to @username used by humans, Telegram users also have numeric IDs. Telegram Bot API can only be used with numeric IDs.
This part is a little tricky because there's no mechanism to get your user ID from the app itself. But it's easy to get using Telegram Bot API.
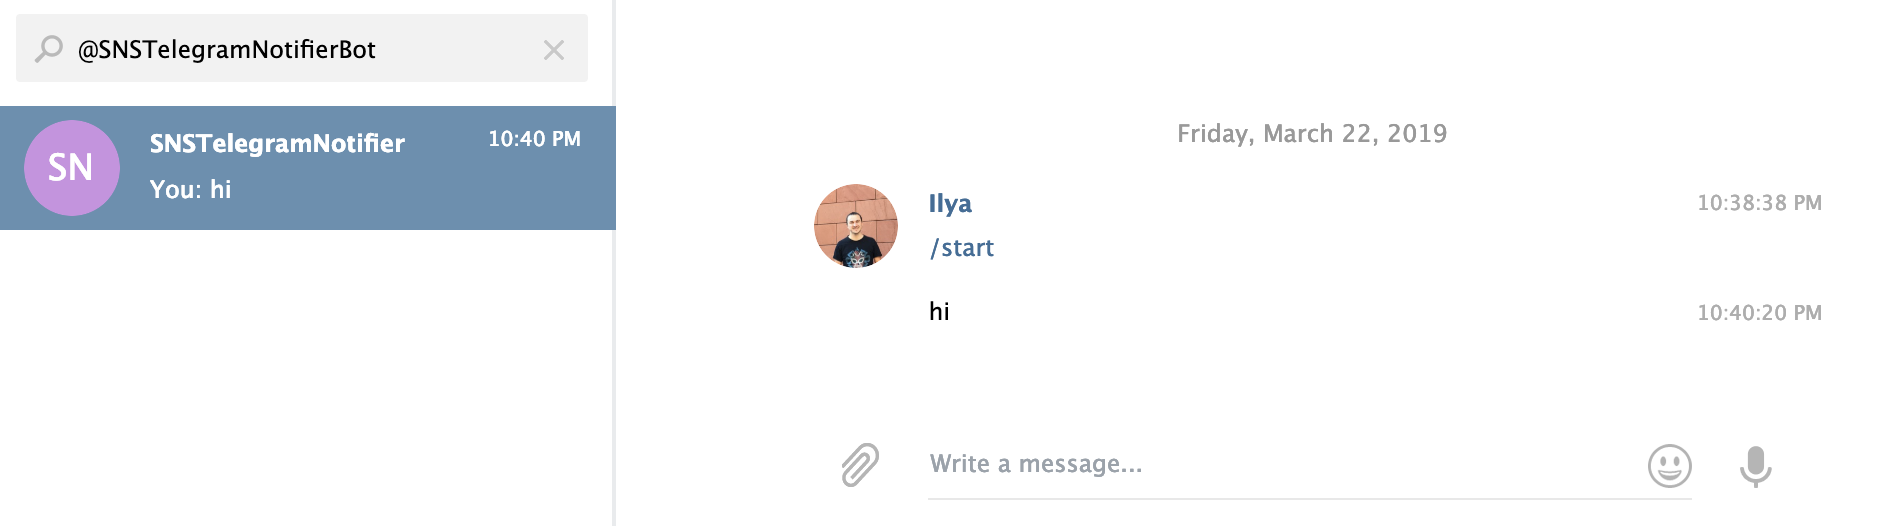
2.1 Start a conversation with the bot.
Find your new bot by the user name, e.g. in my case I used @SNSTelegramNotifierBot. Send something to the bot to initiate a conversation.
2.2. Retrieve the message using Telegram Bot API
The message we just sent created a chat on the Telegram back-end and we can now use Telegram Bot API to retrieve that message and see the associated metadata, including the numeric user ID. To do that, we will use Telegram's getUpdates method by sending a simple request from a web browser.
Compose a URL using the following pattern: https://api.telegram.org/botTOKEN/getUpdates.
It should look like this.
https://api.telegram.org/bot123456789:kjlfjksdfhhsdlkfhksjFKJHFJ/getUpdates
Important: Don't forget the bot prefix before the token. Otherwise, it won't work.
Now open this URL in a browser.
2.3. Get user ID from the message
When you open this URL in the browser, you should get back a JSON that contains the message you just sent and a bunch of metadata about the chat. The user ID is under [result][message][from][id] in the highlighted line in the snippet. Note that for private chats, the ID of the chat in line 17 matches the user ID in line 9. Save the user ID value, we'll need it later.
{
  "ok": true,
  "result": [
    {
      "update_id": 123456789,
      "message": {
        "message_id": 112,
        "from": {
          "id": 987654321,
          "is_bot": false,
          "first_name": "Firstname",
          "last_name": "Lastname",
          "username": "username",
          "language_code": "en"
        },
        "chat": {
          "id": 987654321,
          "first_name": "Firstname",
          "last_name": "Lastname",
          "username": "username",
          "type": "private"
        },
        "date": 1553317998,
        "text": "test"
      }
    }
  ]
}
3. Create an SNS Topic
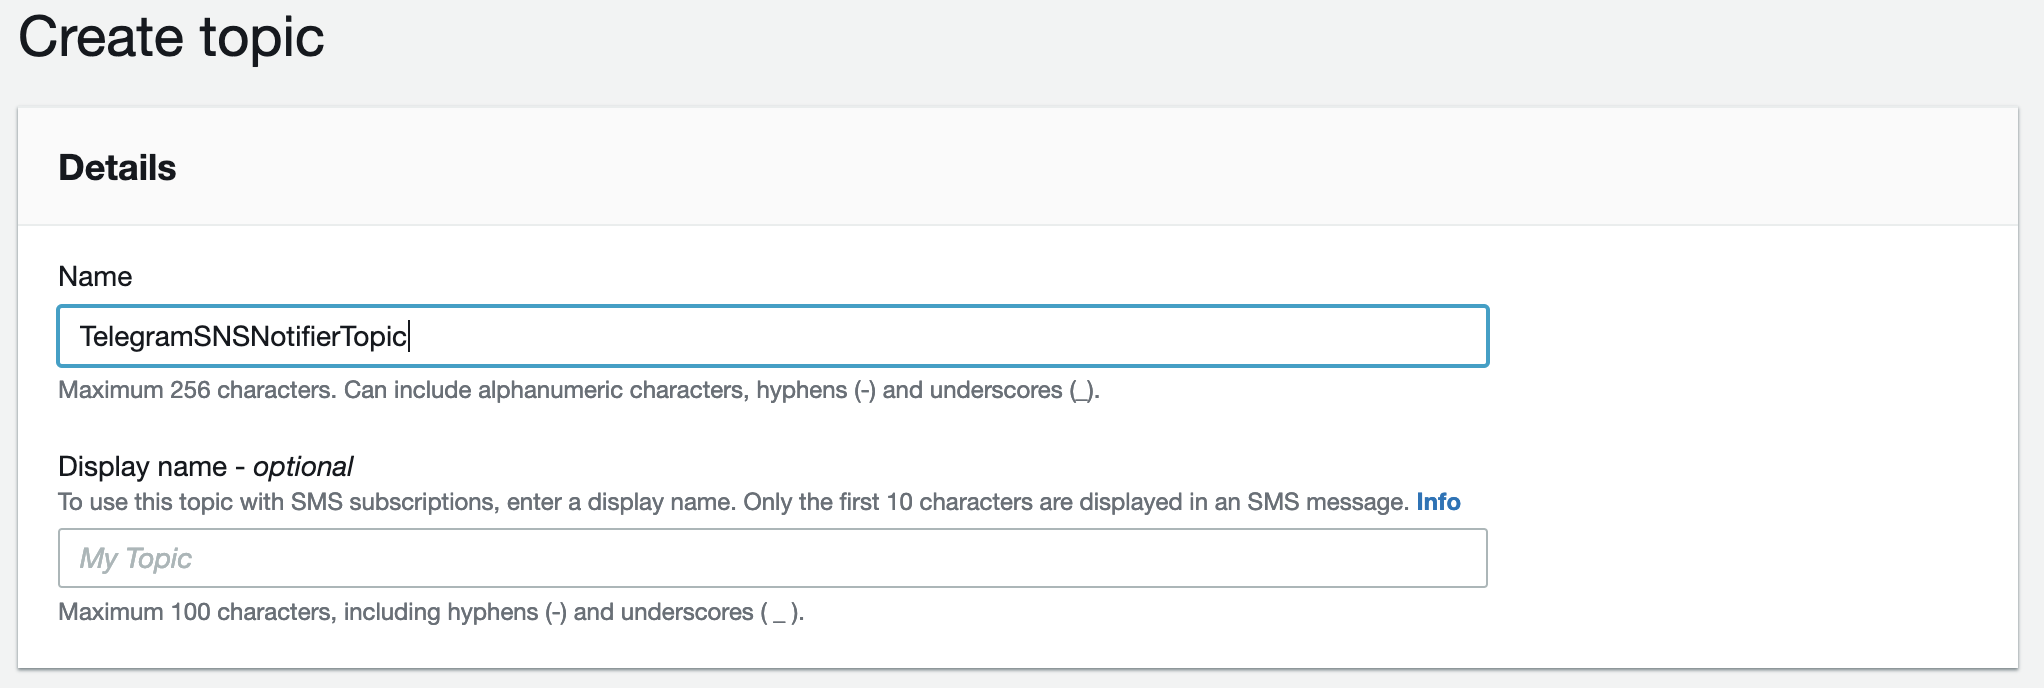
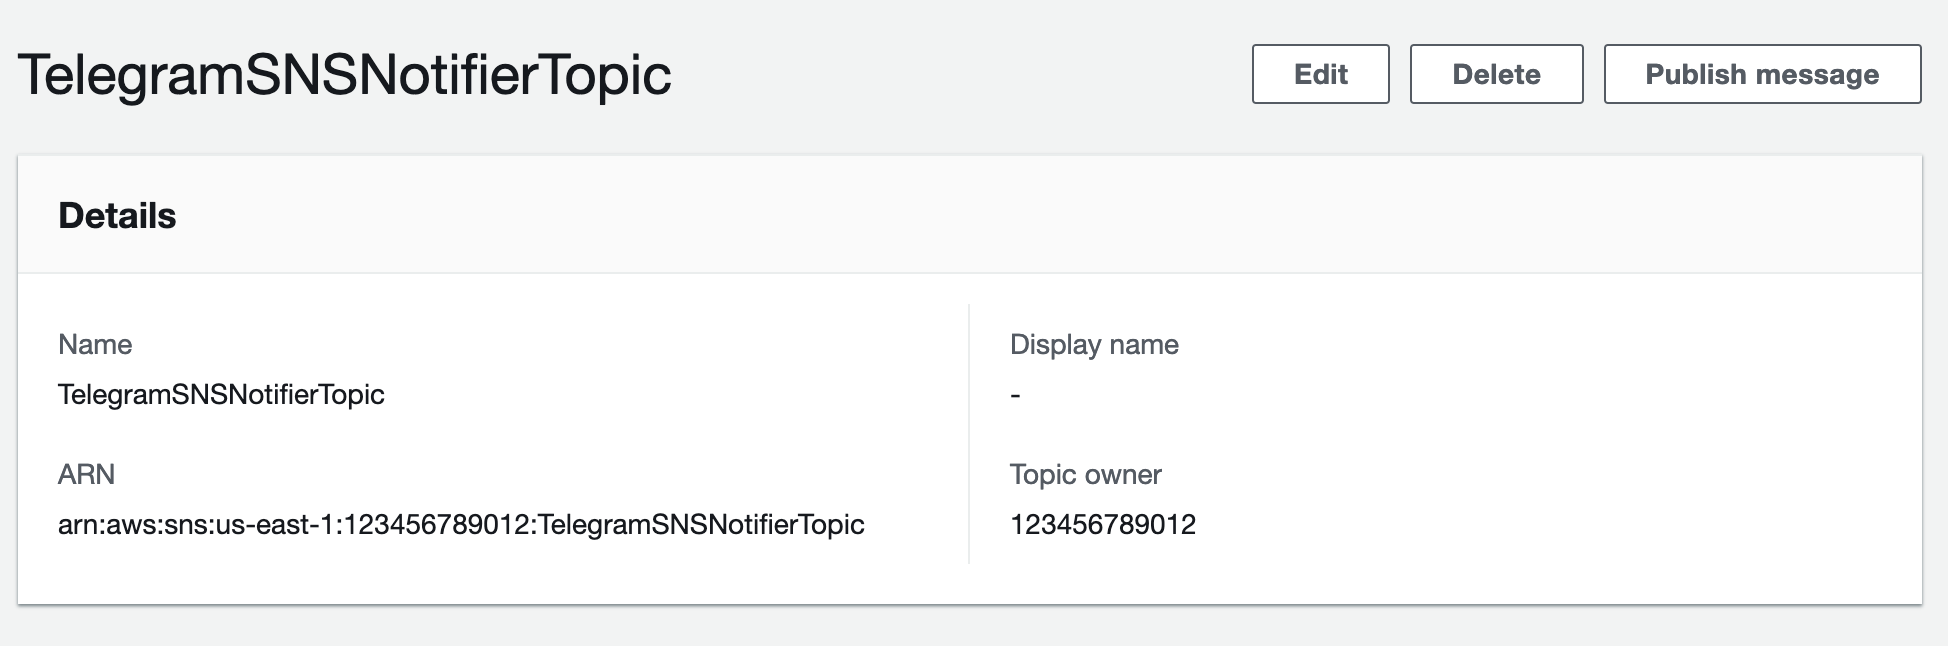
Go to AWS Management Console > Simple Notification Service > Topics > Create topic. Give it a name and click Create topic.
4. Create a Lambda function
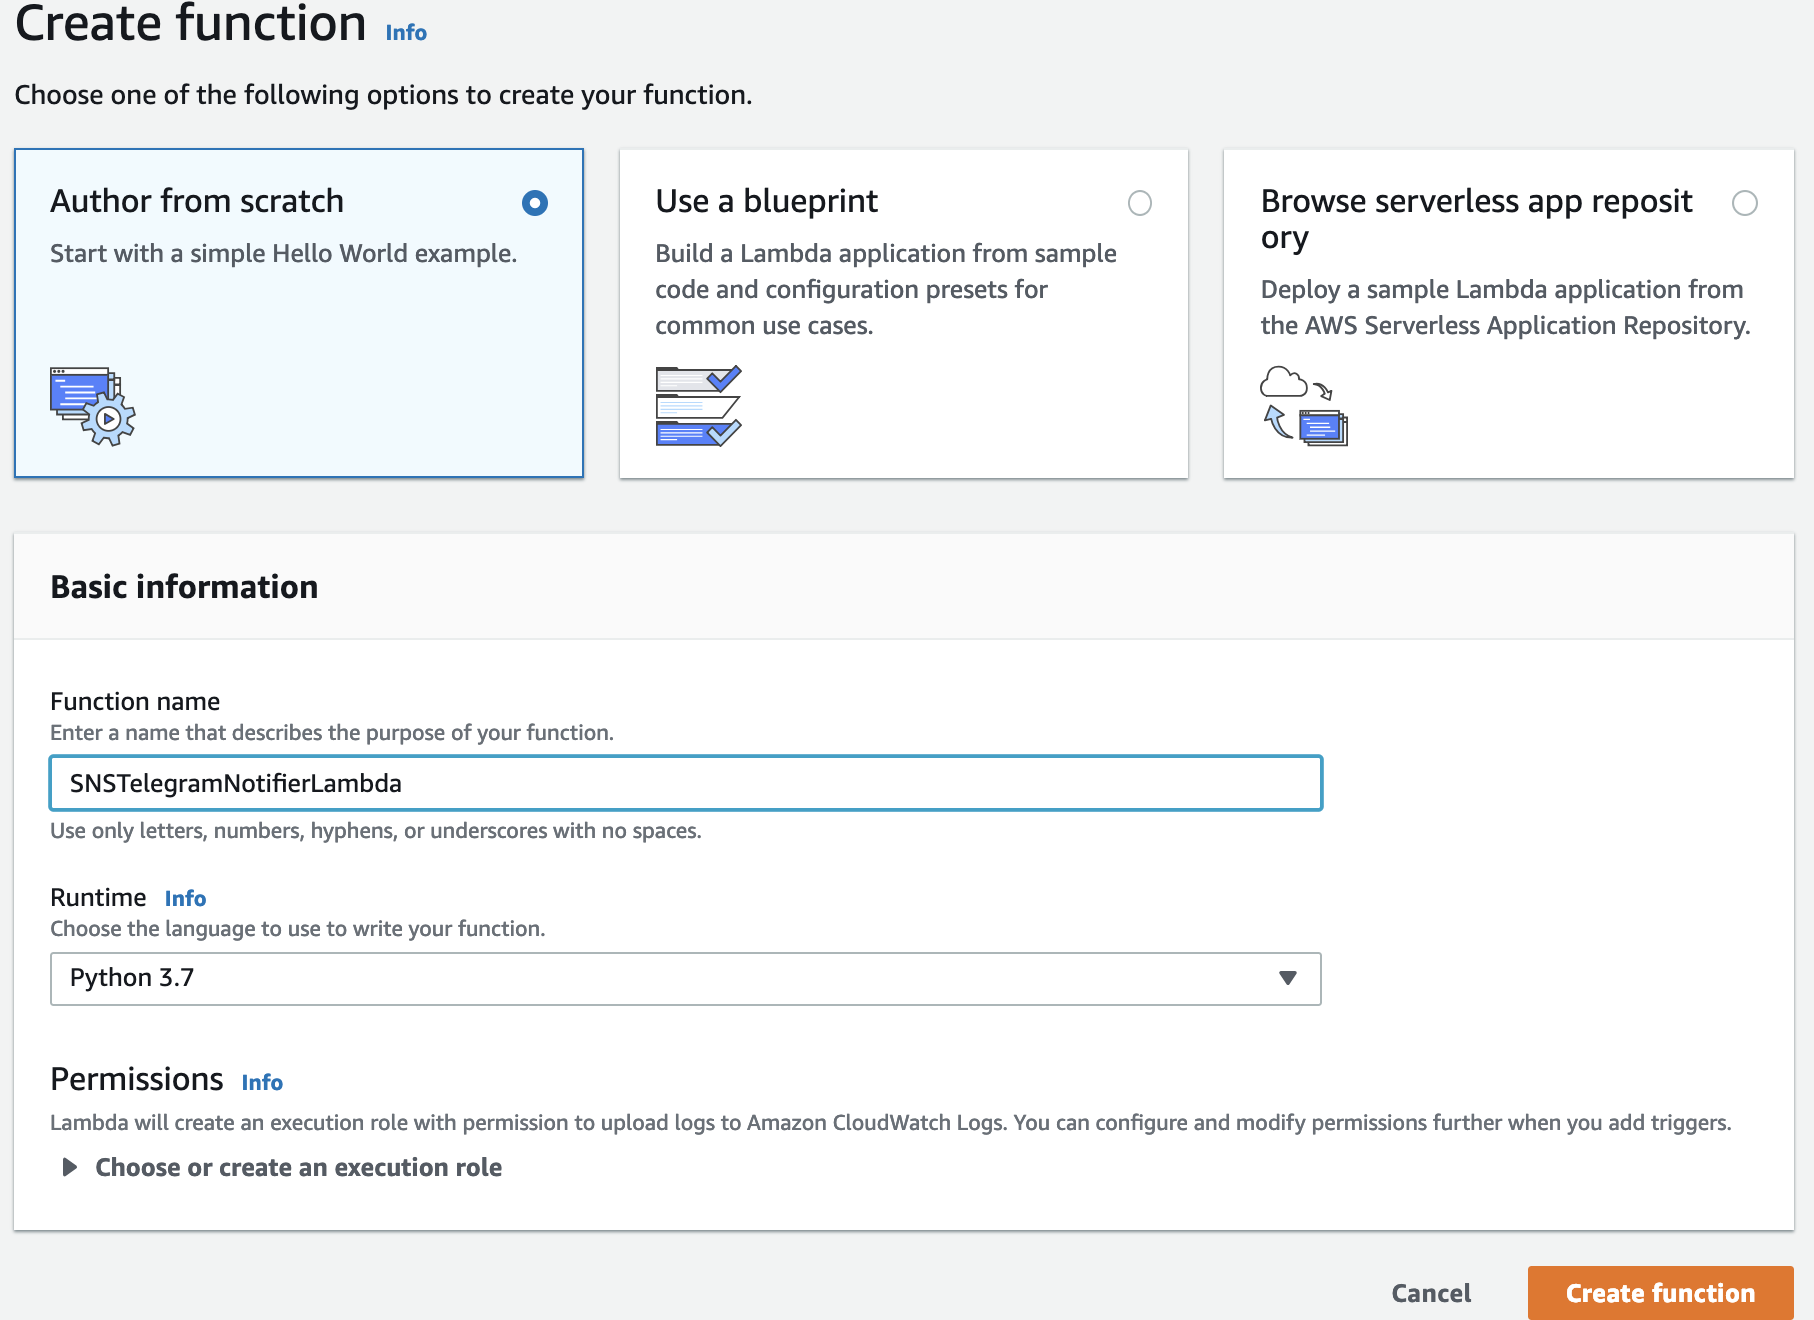
4.1. Create a function
Go to AWS Management Console > Lambda > Create function. Give the function a name and select Python 3.7 Runtime. Click Create function.
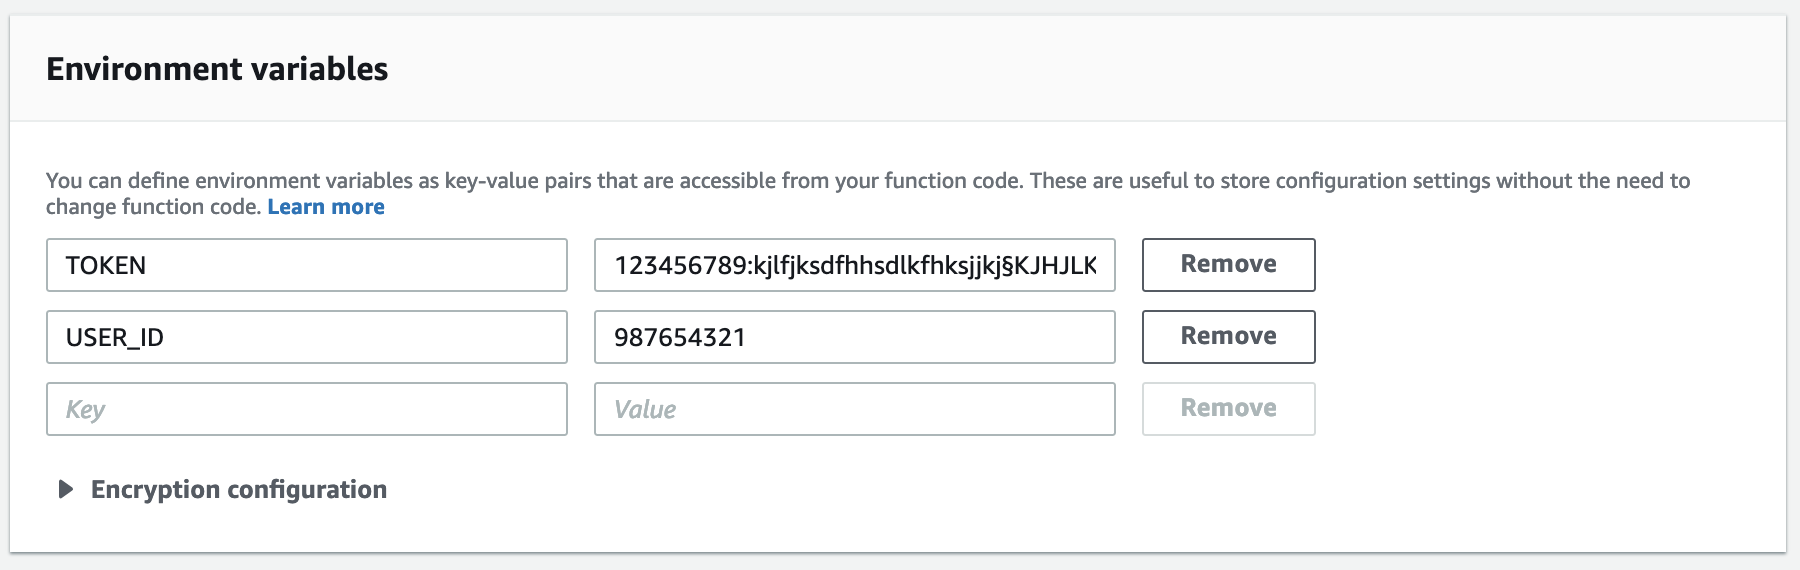
4.2. Configure environment variables
Scroll to the Environment variables section and create variables TOKEN and USER_ID using values from the previous steps. We do this to avoid storing these variables in the code. Ideally, you should not store the token in an environment variable and use AWS Secrets Manager instead.
4.3. Paste the code
Paste the following snippet in the Function code section and click Save.
import json
import os
import logging
from botocore.vendored import requests

# Initializing a logger and settign it to INFO
logger = logging.getLogger()
logger.setLevel(logging.INFO)

# Reading environment variables and generating a Telegram Bot API URL
TOKEN = os.environ['TOKEN']
USER_ID = os.environ['USER_ID']
TELEGRAM_URL = "https://api.telegram.org/bot{}/sendMessage".format(TOKEN)

# Helper function to prettify the message if it's in JSON
def process_message(input):
    try:
        # Loading JSON into a string
        raw_json = json.loads(input)
        # Outputing as JSON with indents
        output = json.dumps(raw_json, indent=4)
    except:
        output = input
    return output

# Main Lambda handler
def lambda_handler(event, context):
    # logging the event for debugging
    logger.info("event=")
    logger.info(json.dumps(event))

    # Basic exception handling. If anything goes wrong, logging the exception
    try:
        # Reading the message "Message" field from the SNS message
        message = process_message(event['Records'][0]['Sns']['Message'])

        # Payload to be set via POST method to Telegram Bot API
        payload = {
            "text": message.encode("utf8"),
            "chat_id": USER_ID
        }

        # Posting the payload to Telegram Bot API
        requests.post(TELEGRAM_URL, payload)

    except Exception as e:
        raise e
Acknowledgement: This code is partially based on Andrii Dvoiak's post on HackerNoon
4.4. Add SNS trigger
In the Designer section, select SNS under Add triggers.
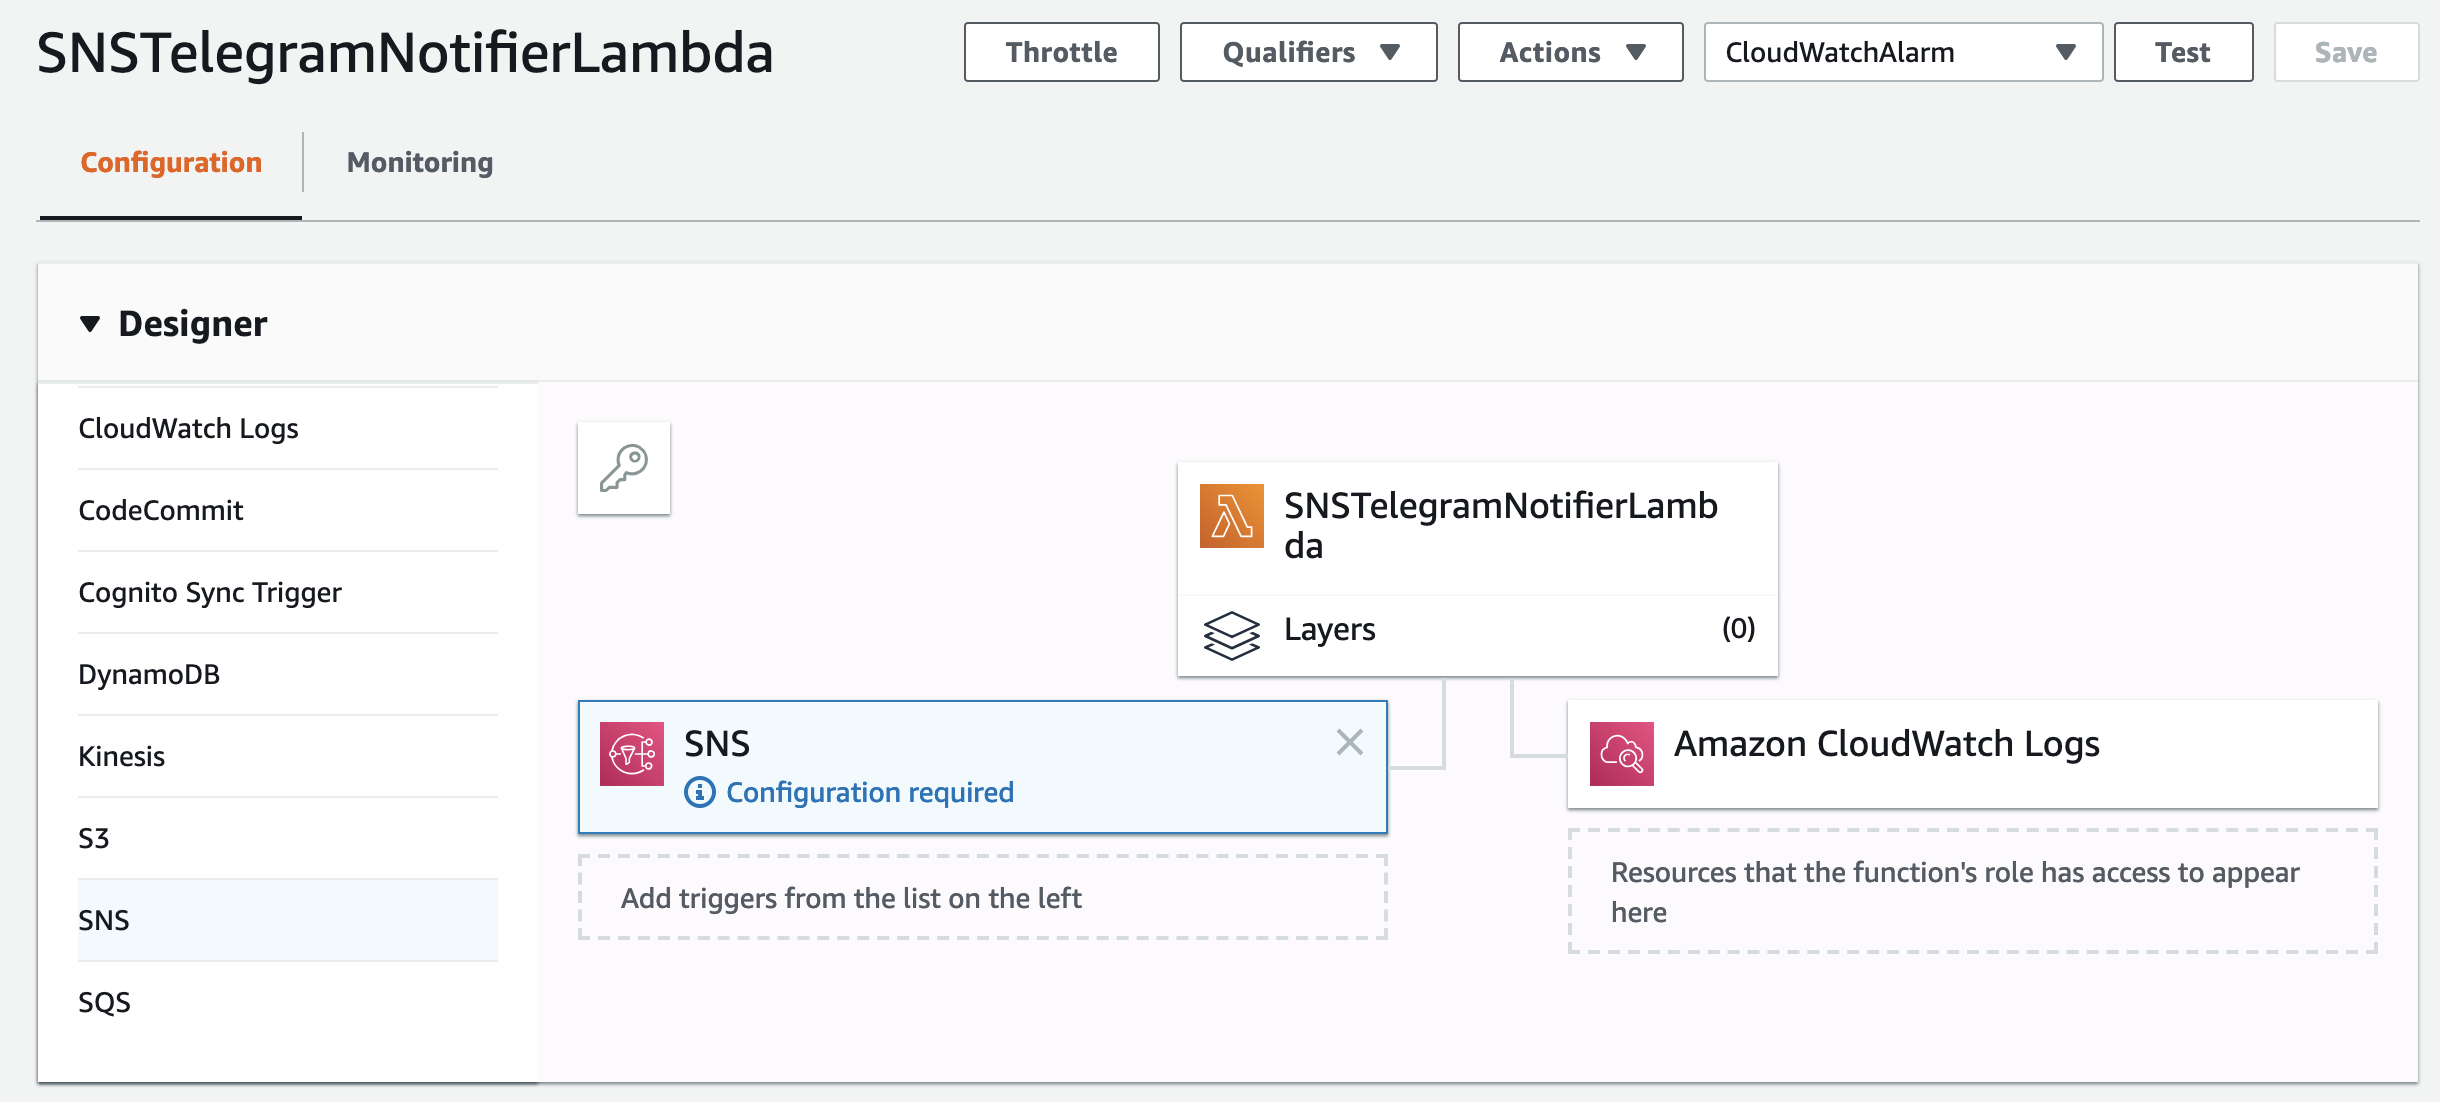
Select the topic you created in step 3 and click Add. Save the function again.

The configuration is now complete!
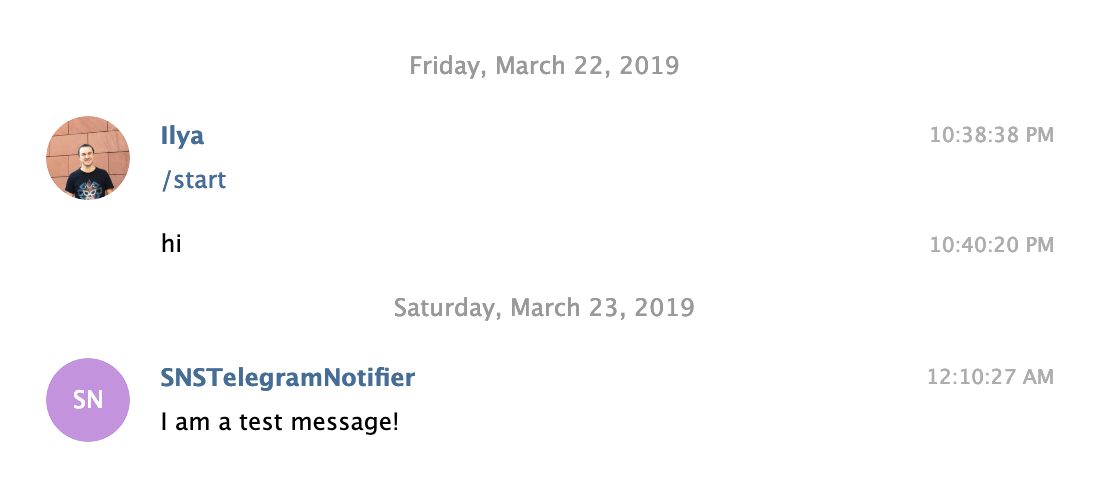
5. Test
Go back to the SNS console and open the topic you created in step 3. Click Publish message.
Type something in the Message body to send to the endpoint and click Publish message.
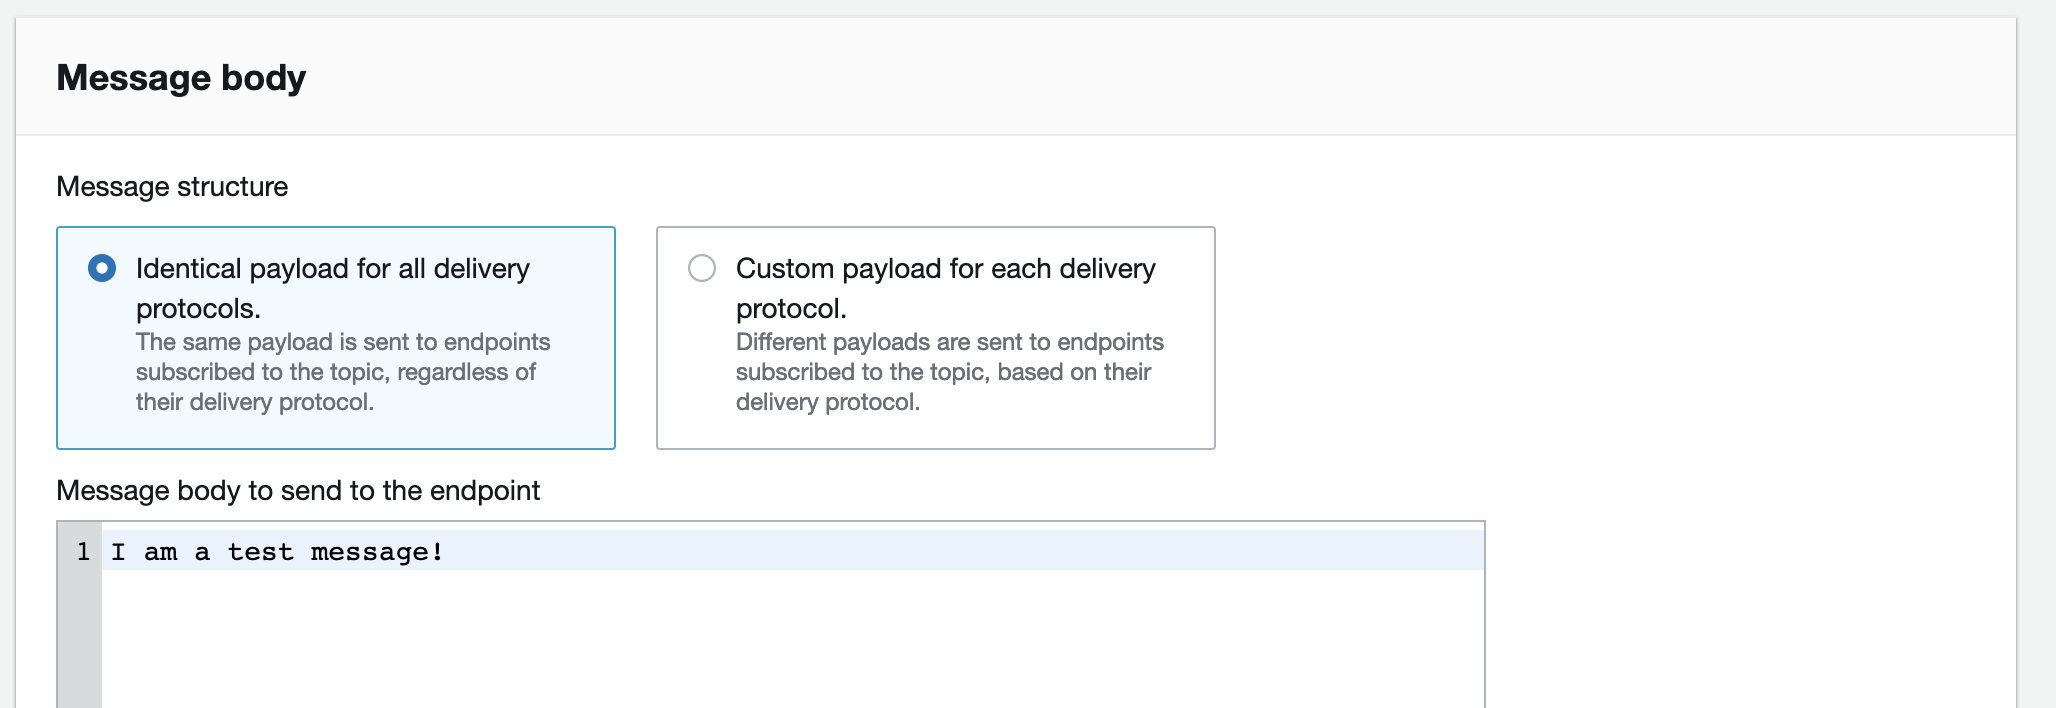
You will see the message in Telegram immediately.
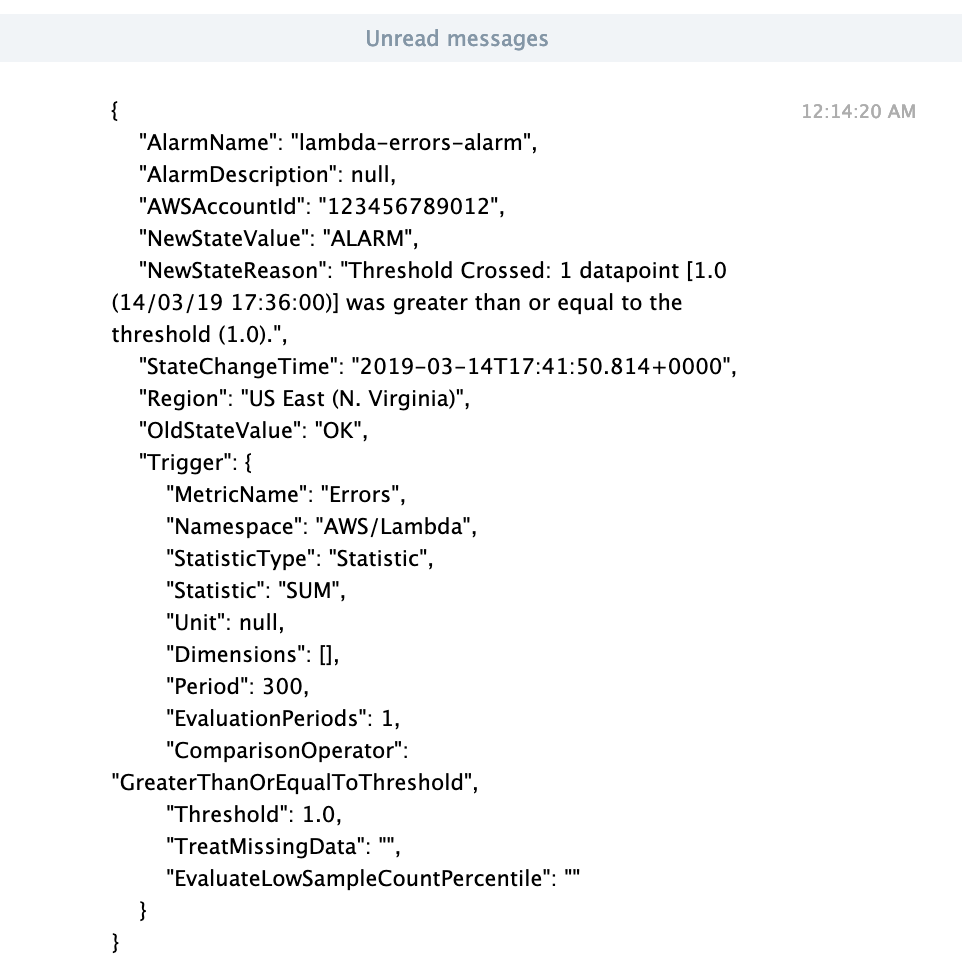
Bonus: Pretty JSON
You can also publish JSON objects, such as CloudWatch Alarms, and the code will format it with indents for better readability using the process_message function. With this, you can use Telegram as your private ChatOps channel to receive programmatically-generated events, such as CloudWatch alarms or CloudFormation stack updates.